
Adrian Batnik
I recently found myself in the situation that I needed to inspect the https traffic of an app on my Android device.
The most popular answers on Google were either using some proprietary software, such as Charles Proxy, or required using a specific emulator, e.g. Genymotion.
As is turns out, there is a third option using the open-source proxy mitmproxy.
The software can also be used to inspect not only your Android traffic but basically any communication that you can pipe through the proxy.
This guide helps you setting up mitmproxy on your machine, possibly setting up your Android device and gives an introduction in how to use the software.
The name comes from the famous Man-in-the-middle-Attack and also very much captures the mode of operations of this software.
mitmproxy represents a proxy that acts as middleman between your application, e.g. an app, and the receiver.
It tracks all your requests and also server responses and makes them available to you for inspection in order to intercept and modify them.
It works with either http or https.
The first step is to head over to the MITM project page, download and install mitmproxy.
For the interested, the project is source code and hosted on Github.
The recommended way to install mitmproxy on Linux is to download the binary-packages from our releases page.
I paste the manual installation steps with pip3 for Ubuntu here.
For all other operating systems, please head to their website.
The one thing to note here is that mitmproxy needs the gcc-compiler for the installation.
sudo apt install python3-pip

# Please make sure to upgrade pip3 itself
sudo pip3 install -U pip

# Now you can install mitmproxy via pip3
sudo pip3 install mitmproxy
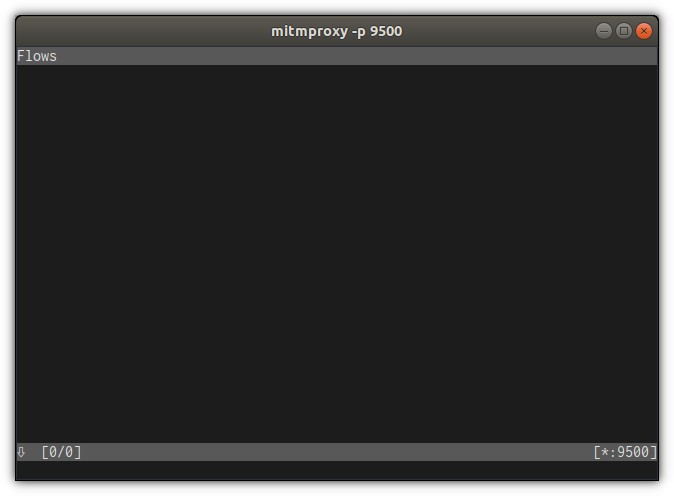
Once this is done, you can already start mitmproxy via sudo mitmproxy -p 9500, where 9500 is the port that mitmproxy will use.
At the first glance, it might look a bit intimidating as it purely console-based and can only controlled via the keyboard.
But do not worry, I will describe the workflow with the most important commands in the last section of this post.
Note: There is also mitmweb, which provides only some functionality of mitmproxy in your web browser via an clickable interface, but I will only briefly mentioned it in the end.
You are ready to go now, if you want to tunnel the traffic from an application on your machine through the proxy.
Note that mitmproxy is not limited to solely running on your local machine but may also serve as proxy in your network.
If you also want to inspect the traffic an Android device, follow the instructions in the next section.
Otherwise, you can skip the next part and skip to last section for some instruction on mitmproxy.
If you want to inspect traffic from an Android device or a single app, you basically have the choice between inspecting the traffic from a real device or an emulator. I will start describing the steps for the later as it offers method for configuring the proxy, that is not possible with a real device.
If you are an Android developer, you will mostly likely start your emulator via Android Studio.
For the first method for work, you have to start it manually by going to your Android SDK folder and then invoke tools/emulator -avd [EmulatorName] -http-proxy http://localhost:9500.
[EmulatorName] references an *.avd image on your local machine, usually ~/.android/avd/, and must be without the path or the .avd file extension.
The emulator names correspond to how he is named in in Android Studio.
The URL at the end corresponds to the host and port, where you previously started mitmproxy.
Open the browser app on the device with a non-https website and you you should see a warning that your connection is not private.
Add an exception and load the page.
You should see all the traffic now showing up in mitmproxy.
In order to also inspect https traffic, visit mitm.it in the browser app.
Download and install the certificate on your device.
On newer Android version, this requires you to also protect your device by either a pin or fingerprint.
Now, after refreshing the website, the certificate warning should be gone and you should be able to also see all the https requests in mitmproxy.
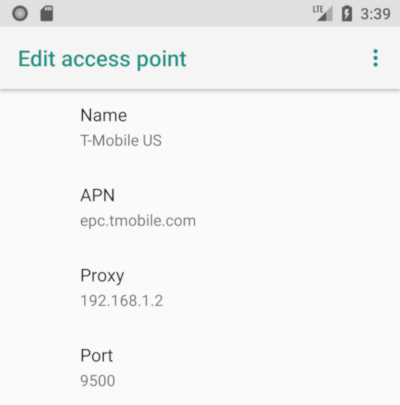
If you want configure the proxy address at runtime, or have a physical device, you have to specify the proxy address in the Android network settings. For the emulator, go to your network settings, select Cellular Networks, Access Point Names and finally the entry (I guess the default entry is T-Mobile US). Here your can specify the URL and the port as you can see on the screenshot. Leave all other values untouched. For a real device, simply open the advanced WIFI settings and specify the corresponding values.
Important: The new settings will only become active, if you restart the network.
Do this by toggling the flight-mode.
Check if everything works by opening some non-https sites in your browser.
They should now appear in the mitmproxy proxy interface.
Note: For emulators above API level 23, there is a setting in Developer Settings for configuring the device to use the legacy DHCP client instead of the new one. This must be configured to use the legacy one.
In addition, if you want to inspect https traffic, open the URL https://www.mitm.it and install the certificate for your platform.
After doing this, it might be necessary, to restart networking once again by toggling the flight-mode.
By now everything should work fine and you are ready to do some real work with your Proxy.
Read on for some instructions on how to efficiently use mitmproxy.
mitmproxyBy now, mitmproxy should be up and running and you should have seen the first requests coming in.
On the bottom left, you see the index of your currently selected request and the total number of requests.
On the bottom right you see the port mitmproxy is runnign on.
The default help command ?.
The currently selected request is marked via >> on the left side of the requests.
You can also see the http-Method and the return code for each request.
Basic up and down navigation between different requests is done via vim-style J and K.
Each new requests will appear at the bottom of the screen.
Once the screen is full, mitmproxy will not scroll down by default.
Press F to select following, which then will also be indicated in the bottom bar, to automatically scroll to the most recent request.
Selecting a request via Enter will show it in the 3 detail tabs Request, Response and Detail.
Switching between them is easily possible via H and L or via TAB.
You may also use the mouse, but as you hopefully have noticed up until now, using the keyboard is much more convenient.

Finally, some useful features when inspecting real-life traffic.
By clicking l you can specify a filter.
Simple enter a term which you want to filter, e.g. an endpoint or a keyword and all corresponding requests will be shown.
Also, you set mitmproxy to only show requests from a specific domain by specifying ~d www.mycustomdomain.com in the filter.
More advances use cases are explained in the help section, such a filtering by assets, method or header.
You may also intercept certain requests by setting an intercept filter via i.
The same filter mechanism as before applies.
Other requests will not be affected by the intercept filter, but all outgoing and incoming requests that do match will be marked red a wait for your decision.
Navigate to the specific request and either press a for allowing only this request, or A for allowing all.
Requests can be deleted via d.
Once very convenient feature is exporting the request directly for various formats, e.g. curl or httpie.
In versions of mitmproxy before the 3.x release, it was also possible to directly export the request as python code.
However, due to the high maintenance overhead, this features has unfortunately been removed.
For further information, please see here and here.
For all folks, who prefer a web-interface (Why?!), there is also mitmweb, which provides some of mitmproxy’s features and may be controlled via the mouse.
$ mitmweb
Web server listening at http://127.0.0.1:8081/
Proxy server listening at http://*:8080
mitmproxy offers many more features such as exporting and importing flows or running scripts on certain requests, but I will not discuss them here.
Finally, you can quit mitmproxy by pressing q.
For creating the gif, I have used the tool ttygif.
This post gave a brief introduction to mitmproxy, the setup on an Android phone and a small usage guide.
You should now be able to inspect the outgoing and incoming traffic of your apps or applications.
I hope you have learned something. Please let me know in case you have any further questions.


